Five Steps to a Successful Blog

Diposting oleh De Journal di 06.53

Rabu, 21 Januari 2009

1. Have a reason. A blog without a purpose is just a daily blah blah blah. You should have a vision for your blog from day one. There needs to be a purpose for it to fill the voids in your website advertising and marketing plan. Use it as a testing ground, a news release center and a central location for all of your info to trace back to.

2. Optimize the darn thing. There is no point in wasting time on unutilized content. We can‘t say it enough: make SEO a habit for every single thing you do. Print out your keywords and keyword phrases in large type and tape them to the wall above your desk. Live, breathe and think those words until optimizing becomes second nature Use distinct title tags separate from the on page titles. Tag. Tag. Tag. Tag. Do you hear me? TAG.

3. Plan ahead!! If you have a new product or service coming out, start creating a buzz. You have the power over your blog. It is a tool. Use it. You can run polls, take surveys, have contests. Use your blog to disseminate information,. Link back to it from articles as well as linking back to your website.Double the fun, and give your customers what they need.

4. Make your blog part of the social network. Think long and hard before enabling comments. You need to be responsive. Link to other blogs in your niche. Make your blog the natural hub for all of your social applications - MySpace, Facebook, Twitter, Plurk, LimkedIn, etc. All roads should lead back to Central - your blog.

5. Track your blog’s success - Decide what your objective is, then take a few minutes to determine your blog’s bench mark. Track your visitors and see who you are attracting, and what demographics you are weak in. ROI can be a sketchy idea in social marketing, but track the time you put in with the conversion rate from consumers who make the jump from your blog to your site or who click an affiliate and you can get an idea of performance.

If you can actually make a blog productive, it is more than well worth your time.

click here for souce

Write Your Keywords for the Front and Back of Your Web Pages

Diposting oleh De Journal di 06.50

Here are a few things about search-engine optimizing copy to keep in mind:

1. When people talk about keywords, what they’re really talking about are keyword phrases.

2. Stuffing the front of your pages with your keywords willy-nilly isn’t going to work. Searchbots look at keyphrases and sequences of keywords, the proximity of keywords to each other, where they appear on the page and at synonyms that are contextually related to your keywords. Over do it, and searchbot will recognize your stuffing the page and calculate it’s all spam.

3. Over doing your keywords will also make your readers seasick. Vary your sentences and work on making your writing compelling. You can keep the reader in mind and make your Web design and blogs search-engine friendly without being boring.

Here are a few tips for keyword integration and SEO:

1. Titles

Your keywords should be on the top shelf, where are the good stuff is always displayed in liquor stores (or “packies” as we say here around Boston). Put keywords into the titles of your post but don’t forget you’re just as interested in writing compelling, descriptive titles that pull in readers as you are in feeding searchbots.

2.Headlines

Also use your keywords in headlines and put them first when you can. The head should express one complete idea or thought, which is what Sister Mary Agnus taught me in parochial school. If I didn’t think so, she’d whack me with a ruler, so it must be true.

3. Subheads

Subheads break up long blocks of copy and give readers some white space to help them scan. It’s always better to be clear than cute. I’m not always terrific at practicing what I preach, I’ll admit. Searchbots give more weight to subheads, so put your keywords there too.

4. Body copy

Put your keyword phrases toward the top of pages and in opening paragraphs. While you’re at it, anticipate the sequence of words someone might enter into a search engine and make sure those on your site match up. If your business is designing motorcycle engines for drag racers, your keywords might be: motorcycle, engines, drag racing. Now, if someone needs a fancy motor, what would they enter into a search bar? It will probably be something like “drag racing motorcycle engines.” That a keyword phrase to aim for.

Your pages should be keyword rich but not keyword dense. Searchbots tend to suspect too much of a good thing is bad. Some researchers claim keyword density should vary between 5% and 20% of the words on a page. A searchbot could interpret pages that exceed those numbers as spam and ignore them, they say. Sounds good to me.

Searchbots give more weight to bold, italic and underlined fonts. Not many writers underline copy because readers might confuse those words as links. “You pays your money and you takes your choice,” my old man says way too often.

Omit “Welcome to…” and “Our company is…” and other needless words. Get busy and start your sentences with keywords related to the products and services you sell.

Put your keywords into press releases, buyer’s guides, how-tos, instructions manuals—everything you can get your hands on. Use HTML and PDFs.

5. Numbers and bullets

As I noted the other day, readers love numbered and bulleted lists. They’re easy to scan and contain loads of information but don’t take up much real estate. Those are primo places for keywords.

6. Links

Use keywords in your links and make your links descriptive. You need more than click here and continue
links. They must say something meaningful so the reader knows exactly where that link will take them. The other reason is that should others link to your site, they’ll use the same keywording that you’ve used and that will help raise your flag a bit higher. As I mentioned the other day, links also break up blocks of copy and help the reader skim.

8. Call to Action

The profs in every ad-writing class I enrolled in in college hammered on the need to include a call to action in my copy. What do you want the reader to do? Send money to you in Nigeria? Marry your sister? Whatever it is, point them in the right direction. Reinforce your call to action with your keywords. I covered a lot of that in AIDA is an Old-School Writing Technique that Still Works in a Web World earlier in the week.

Conclusion

Keyword-rich content matters most. The trick is to use keywords to guide readers and to feed searchbots at the same. Keep in mind the reader comes first–always. If you write for the back of your pages, the front of your pages won’t work hard enough for you.

Click here for source

How to Get People to Re-Visit Your Blog

Diposting oleh De Journal di 06.47

You can make your blog something that people look forward to simply by setting up a pattern of themes throughout the week. Get people interested, and give them something to share. The following are some ideas you could use to set up your blog - just make sure once you start a program like this that you follow through - even if it means writing a bunch of content like mad for a week or two to create a stockpile, or hiring a blogger to take care of daily posts. (Make sure you can trust whomever you hire to provide original content!)

1. Monday can be a kick start to the week. Try a theme like “Tip of the Week” to make everyone’s work week go better. Add a funny photo to beat the ‘Monday Blues’ and ask for people to offer captions. You can publish the winner later and have a token prize for best caption. Add an interesting informative article to get people thinking.

2. Tuesday. Everyone’s past the Monday Blues and digging into the work week. Time for ‘Tuesday Trivia’ so have a quiz, a list of little known facts, or something else that tickles the brain.

3. Wednesdays are that pothole in the middle of the week that suck us down and we start to flag. Just go with it, and do a “Pet “peeve” of the day, maybe followed by a “I hate such and such because” article that can be tongue in cheek to get a wry laugh.

4. Thursday. I like to add a ‘Mythbuster’ somewhere in the week, and Thursday is as good a day as any. Burst somebody’s bubble. Also do a poll, people need to feel like their opinions count.

5. Friday is a happy day, a cause for rejoicing. Post the winning caption and photo, post a completely unrelated and hysterical TGIF video, post yourself doing the Snoopy dance on YouTube. Oh, and the results from the poll the previous Thursday, maybe with a short article pertaining to the topic.

Weekends can be a free for all. If you post something really good, make sure you feature a snippet and link on Monday. If you can keep people interested and coming back for more, they will eventually start linking to you to share, and you can also funnel traffic to your website!

click here for source

How to Create a Website with Dreamweaver CS3

Diposting oleh De Journal di 06.45

Adobe Dreamweaver Creative Suite 3 (CS3), formerly known as Macromedia Dreamweaver, is a fully-featured commercial web editor that allows you to create, build and manage complex websites. The editor is a What-You-See-Is-What-You-Get (WYSIWYG) web editor, which means that you can design your web page visually and whatever you see on the screen is what your visitors will see when they visit your website. Dreamweaver generates standards-compliant code for your website which means your website will not become “broken” every time a new version of a web browser is released. For the technically inclined, the HTML and CSS code that it creates for your website will validate correctly.

This tutorial guides you through the steps of creating your first website using Dreamweaver.

What You Will Need

  1. Dreamweaver

    You will need Dreamweaver (obviously). The tutorial assumes that you are using Dreamweaver CS3. There are versions of Dreamweaver for both Windows and Mac OS X - either version will do fine. For the most part, both versions work in the same way.

  2. A Web Hosting Account

    You will need a web host to publish your pages to. For the complete beginner, a web host is (loosely speaking) a company which has computers that are permanently connected to the Internet. After you design your web page(s), you will need to transfer your pages to your web host’s computer (called a web server), so that the rest of the world can see it. There are numerous web hosts around - you can find a list of cheap web hosts on http://www.thefreecountry.com/webhosting/budget1.shtml

There are other things involved in getting your first web site up and running, such as getting your own domain name, making your website search engine friendly and promoting your web site. This tutorial however does not deal with those matters - it is strictly about designing (creating) and publishing (uploading) your website using Dreamweaver. If you are a total beginner, you may want to consult my article The Beginner’s A-Z Guide to Starting/Creating Your Own Website for an overview of the entire process and all the things you will need.

Overall Goals of the Dreamweaver Tutorial

By the end of this tutorial, you will have set up a working website with multiple pages, including a main page, a feedback form, an About Us page, and a Site Map. Your pages will contain a sophisticated navigation menu bar, images, multiple columns, a form, links to other pages within your site, links to other sites, text in different font sizes, etc. In other words, you will have a fully functional website.

More importantly, you will know how to use Dreamweaver to create, design and publish your site so that you can design new sites any time you want.

Goal of this Chapter

In this chapter, you will learn to create a rudimentary two-column web page (like this web page that you are currently reading) and publish it so that it can be accessed on the Internet. By the end of this chapter, you will be viewing your web page on the Internet with your favourite web browser.

Note that this is a hands-on tutorial. To benefit from it, in fact, to even understand it, you need to follow the steps as I describe them. The practical nature of this guide makes it difficult to follow or understand if you’re not doing the things mentioned.

Setting Up Your Website in Dreamweaver

Start up Dreamweaver.

Picture of Dreamweaver CS3 at startup

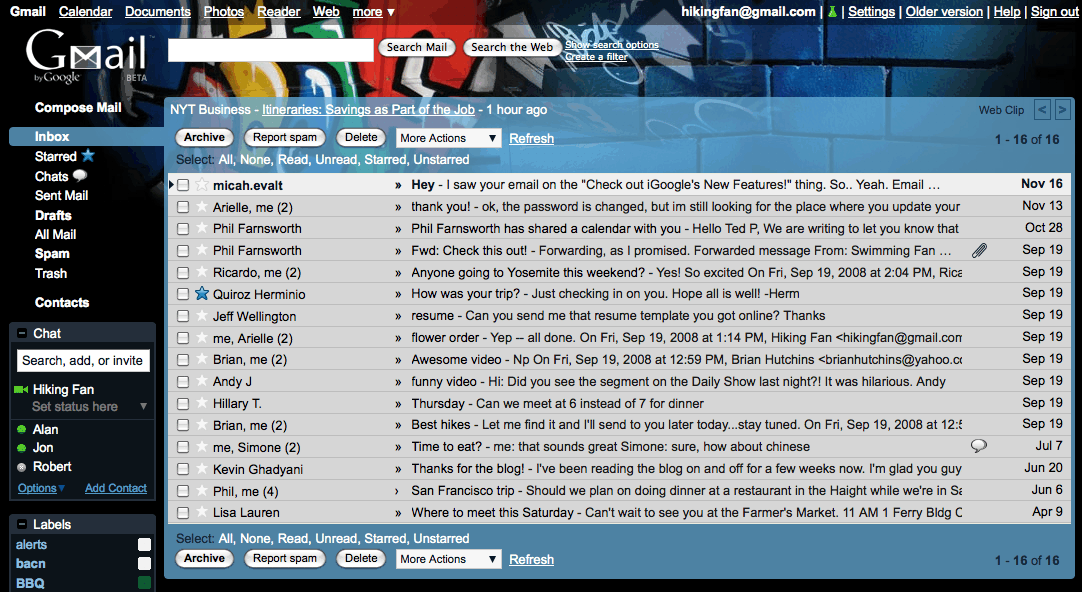
You will be greeted with a window with a top-half looks something like the picture above (without the words “Dreamweaver Tutorial thesitewizard.com” of course). Your picture may be slightly different depending on whether you are using Mac OS X, Windows XP or Windows Vista.

If you look at the top part of the window, you will see a menu bar that reads “File Edit View Insert Modify Text Commands Site Window Help”. We will be accessing a lot of Dreamweaver’s features via this menu bar.

The first thing you will need to do is to define your site in Dreamweaver’s Site Manager. Click the “Site” menu item on the menu bar. A drop-down menu will appear. Click the “New Site…” item in the menu bar.

Important note: in the interest of brevity, in the future, I shall refer to the sequence of clicking the “Site” menu, followed by clicking on the “New Site…” item simply as “Site | New Site…”

A dialog box box will appear with words to the effect “Site Definition for Unnamed Site 1″. The number that follows the word “Site” may be different if you have ever used Dreamweaver to set up a site before. Don’t worry about that. We are about to change it anyway.

At the top of the dialog box is the “Basic” tab. If it is not currently selected, click on it to select it. If you’re not sure, just click on it.

In the edit box for “What would you like to name your site?”, type in the name you wish to give to your site. If you are not sure what name you want for your site, use your domain name. For example, if you have purchased a domain called “example.com”, put “example.com” (without the quotes) into the box. For the purpose of this tutorial, I will assume that you have typed “Example Company” in the box.

Once you have done the above, enter the web address of your site in the box following the question “What is the HTTP Address (URL) of your site?”. For example, if you bought the domain “example.com”, your website address will be “http://www.example.com/” (without the quotes), unless your web host tells you otherwise.

Click the “Next” button at the bottom of the window to proceed to the next screen.

Accept the default “No, I do not want to use a server technology” for now. Click the “Next” button again.

The next screen allows you to define where Dreamweaver saves the files you create. The default is to place the files in a folder with the same name as your website. You can change the location if you wish. Note that this folder merely determines where on your computer the website files are saved. You will be taught how to publish those files to your web host in a later step. It is always good practice to keep a copy of your website on your own computer. If you don’t know what to do here, just accept the default.

When you click “Next”, you will be asked “How do you connect to your remote server?”. For now, select “None” in the drop-down box and click “Next” again. You will then be given a “Site Definition” summary. Click “Done”.

Creating a Simple Two-Column Web Page with Header and Footer

You will now create the main page of your website. For the purpose of this tutorial, we will be creating a two-column web page for the main page. A two-column web page basically means that the page will have two vertical columns. Websites typically use one of the columns to hold the website’s logo and navigation buttons and the other column to hold the main content. For example, on thesitewizard.com’s article pages, such as the one you are reading now, the left column holds the navigation menu while the right column holds the article text.

Click “File | New”. That is, click the “File” menu followed by the “New” item on the menu that appears. A new window entitled “New Document” will appear.

Picture of New Document window in Dreamweaver

Look in the “Layout” column in the window that appears and locate the item “2 column liquid, left sidebar, header and footer”. Select the item by clicking on it once.

Look at the rightmost side of the same window and locate the item “Layout CSS”. Click the drop-down box and select “Create New File”. This will cause Dreamweaver to save certain types of information about the appearance of the web page (called CSS) in a separate file. One of the ways in which this is useful is that when we design other pages of the site, we can reuse the same information by simply loading it from the same file.

Click the “Create” button.

A dialog box entitled “Save Style Sheet As” appears. Accept the default name and location by simply clicking the “Save” button.

Dreamweaver now presents you with a page with two columns with some dummy content typed in. We will be replacing some of the dummy content with our own content.

Designing the Home Page: Preamble

The page you are about to design will serve as the website’s “Home Page”, which means that it is the main page of your website. It is the page that visitors will see if they type your website’s address without specifying any page name. For example, if your domain is called “example.com”, and your visitor types “http://www.example.com”, they will see this page.

A home page typically contains brief information about what the site is about as well as links to the other pages of your website. If this is the home page of your personal site, you will probably want to welcome your visitors and mention briefly what they can hope to see on your site. If this is the home page of a company site, it will typically mention briefly what the company sells, it’s main products and point the visitors to individual product pages or other pages on your site.

For the purpose of this tutorial, I will supply example text for a fictitious company called “Example Company”, selling some fictitious products. You should of course use your own text rather than my supplied text. For example, if your company is called XYZ Inc, go ahead and use “XYZ Inc” in places where I use “Example Company”. Likewise if you are creating a personal website, and you are out of ideas as to what to call your site, call it by your name. For example, if your name is Shakespeare, call it Shakespeare’s Website.

Steps to Designing Your Dreamweaver Site

  1. Take a look at the page that is displayed. You will see that there is a band spanning the entire top row of the page. The words in that band currently read “Header”. Below that there are two columns: a narrow left column, called the sidebar, and a wider right column with the heading “Main Content”. All the text that is given in the window can be replaced by your own content.

    To replace the content, simply click on the word you wish to replace, delete it and type your own. The first thing you should do is to replace the word “Header” with the name of your website. To do this, click somewhere in the word “Header”. A blinking text cursor will appear. Using the delete or backspace key as needed, delete “Header”. Type the name of your website. If you don’t know what to type, type in your name or your company’s name. For the example site that I create here, I will replace “Header” with the words “Example Company”.

  2. Directly above where you typed to replace the “Header” text is a small edit box with the words “Untitled Document”. Click the word “Untitled”. Use the delete or backspace key to remove the existing text and replace it with the name of the site you typed earlier. This will be the text that the search engines show for this web page when it displays the results of a search. Again, for this tutorial’s example site, I will simply replace it with the word “Example Company”.

    Picture of Dreamweaver showing where the TITLE edit box is

  3. You should now replace all the text in the right column with your own text. Simply click on the “Main Content” title and replace it with some appropriate content. You can take a look at the text that I will be using below as an example. When you’ve finished with that, click on the “Lorem ipsum dolor sit amet” (etc) words, delete them and replace them with your message. Typing and editing of text within the page works more or less like it does under a wordprocessor. If you need to create new paragraphs, simply hit the Enter key (Windows) or the Return key (Mac OS X).

    Repeat the process with the “H2 level heading” subtitle and the words that follow. Just replace it with whatever you want your website to display. If you want, you can replace the words with the example text below. However, it’s best to write something that is relevant to your site so that you don’t need to go back and re-edit it later.

    Welcome

    Example Company deals with all manner of examples. We have examples of literary works, pulp fiction, text books, movie reviews, scripts, chairs, tables, household appliances, and so on. We even have examples of examples.

    Featured Product

    Dreamweaver Site: This is an example of a Dreamweaver site, created with the help of thesitewizard.com’s tutorial on Dreamweaver. The tutorial teaches you how to create a basic but fully-functional website which you can modify and augment to suit your needs.

  4. Leave the left column (sidebar) alone for now. We will add a navigation menu to this section in later chapters of this tutorial.
  5. Scroll down to the bottom of the page and replace the word “Footer” with anything you wish to put at the bottom of the page. For example, you can place your copyright notice in place of this word. If you need to insert the copyright symbol, “©”, click “Insert | HTML | Special Characters | Copyright” from the menu.
  6. Once you are satisfied with your page, click “File | Save As…”. A dialog box will appear asking you where to save the page. Type “index.html” (without the quotes) into the “File name” edit box, and click the “Save” button.

    Be sure to type the name “index.html” exactly as I gave it - that is, entirely in small letters (lowercase), with no spaces in the word. “index.html” is a special name in that it is regarded as the default file name for most web servers. When you publish that page to your website at (say) http://www.example.com/, the index.html page is the one that will be displayed when a visitor types “http://www.example.com/” without any filename. It is thus very important that you do not change the name of the file to something else.

Uploading or Publishing Your First Web Page with Dreamweaver: Preamble

Before we proceed to polish the page so that it looks at least half-way decent, we need to publish the page to your web host. One reason we’re going to do this now, even before we’ve finished the page, is that Dreamweaver needs the information about your actual website’s address (or URL) before it can correctly handle things like links and images on your web page. Even though you entered it earlier when you set up your site, it only integrates such information into its system when you publish your page. So even though the page is probably an embarrassment to you at this stage, please complete the following steps, or you will encounter problems later.

Don’t worry about the page being so plain. If you’ve not advertised your website’s address (URL) to anyone, no one will even know your site exists, so this preliminary version of your page will be seen by no one but you. People will not visit your site out of the blue just because you happened to sign up for a web hosting account today. It’s not that easy to get visitors.

Another reason that you’re publishing your page at this time is so that you can get familiar with both the major stages in the design of a web page. Once you get this hurdle out of the way, and you know how to get your web page from your computer into your web host’s computer, you have mastered what is arguably the biggest technical challenge a newcomer is likely to face. Don’t let this scare you though - it’s actually quite easy!

Steps to Publishing / Uploading Your Dreamweaver Site

  1. To publish your website, start up the Site Manager again. To do this, click “Site | Manage Sites…”, that is, click on the “Site” menu followed by the “Manage Sites…” item on the menu that appears. In the dialog box that appears, click on your website’s name, then the “Edit…” button.
  2. The dialog box you encountered when you first set up your website appears. Click “Next…” until you come to the screen with the message “How do you want to connect to your remote server?” In the first part of the tutorial, we selected “None”. We will now change it to the actual values we need for uploading (publishing) your web page. In the drop down box, select “FTP”.
  3. Basically you will need to enter the information that your web host provided you when you first signed up for a web hosting account. Web hosts typically provide you with a whole bunch of details about your account when you first sign up. Among these is something known as your “FTP address”. FTP, or File Transfer Protocol, is the usual means by which you transfer your web pages from your own computer to your web host’s computer. Transferring your pages from your computer to your web host’s computer is known as “publishing” or “uploading” your pages.

    In the empty box for “What is the hostname or FTP address of your Web server?” enter the FTP address that your web host gave you. If you have your own domain and are hosted on a commercial web host, this address is typically your domain name prefixed by “ftp”. For example, if your domain is “example.com”, many web hosts set up your FTP address as “ftp.example.com”. Check the email you received from your web host for more details, or ask them if you cannot find the details. If the address is indeed “ftp.example.com”, enter that in the box here.

  4. To answer “What folder on the server do you want to store your files in?”, check the message from your web host again. Some web hosts tell you that you need to place your web pages in a folder called “www”. Others require you to place them in a “public_html” directory. Still others say that you are to place your files in the default directory that you see when you connect by FTP.

    If your web host tells you to simply upload the files when you connect via FTP, leave the box blank. Otherwise if they tell you that you need to publish your files in a “www” directory or some other folder name, enter that folder name in the box given. If the host does not mention this at all, chances are that you can simply leave the box blank.

  5. Enter your FTP user name or login name into the box for “What is your FTP login?”. Again, this information has to be supplied by your web host.
  6. Enter your password in the box for “What is your FTP password?”. Get your password from your web host if you don’t already know it. If you don’t want to have to keep entering your password every time you publish your page, you can leave the “Save” checkbox activated. Otherwise, if you are sharing your computer with others and don’t want Dreamweaver to save your password, you can uncheck the box.
  7. If you like, you can click the “Test Connection” button to check that you have entered all the information correctly. When you are finished, click “Next…” and “Done” to complete the configuration.
  8. Finally, to publish your website, click “Site | Put”. When Dreamweaver pops out a message asking you whether it should “Put dependent files?” answer “Yes”. This merely means that it is to upload things like your images and CSS files that are required by your web pages. If you don’t want to answer this question every time you publish an updated version of your website, check the box “Don’t show me this message again”.

Testing the Web Page

Before you proceed further, you need to test the version of the web page you have uploaded. This way, you will know whether you’ve made any mistake when entering your details earlier.

Start up your browser. Type the URL (web address) of your website. This is the address that you typed into the “HTTP address” field earlier. For example, type “http://www.example.com” if that is your URL.

If you have entered the FTP details correctly, you should see the page you created earlier in your web browser.

If you get an error like “No DNS for www.example.com” or “Domain not found”, it probably means that your domain name has not yet propagated to your ISP. Put simply, this means that you probably only just bought your domain name. It takes time for a new domain name to be recognized around the world (usually 2 or more days), so it’s possible that your ISP has not yet updated its name servers to recognize your new domain. Some web hosts give you a temporary address which you can use to access your website in meantime. If you have that, use the temporary address to check that your site has been uploaded properly. Otherwise, you’ll just have to wait.

If you get an error like “404 File Not Found” or you get your web host’s preinstalled default page, you may need to go back and check that you have entered the correct folder in answer to the question “What folder on the server do you want to store your files in?”. It is possible that you did not specify the correct directory on your website to publish your web page.

To fix the error, simply click “Site | Manage Sites…” and “Edit” and click the “Next…” button till you get to the appropriate screen to modify.

If you get no errors at all, but see the page that you’ve designed earlier, congratulations! You’ve created and uploaded your first web page. It may be a rudimentary page but you have successfully walked through all the essential stages of designing and uploading a web page.

Click here for source

Skin Retouching Tips In Photoshop CS4

Diposting oleh De Journal di 06.43

A fellow photographer was showing me some images the other day that he had captured with a camera that uses a plastic lens. The images had a certain attraction.

Although the images had some pretty shocking vignetting and heavy distortion he was drawn to the beautiful liquid smooth tones that the plastic lens was offering up. Most women who look at photographs of themselves would agree that crunchy detail is just not a good look.

A digital camera can be a very cruel tool that can capture way too much information. Most people would prefer their skin to appear smooth, but not featureless, and will thank the photographer when they can reveal a skin texture that does not shout its detail to the viewer.

The craft of professional skin retouching is the ability to render perfect skin without giving your model the appearance of a plastic-fantastic shop window mannequin.

Skin Retouching Tips In Photoshop CS4

The image used in the project is a section of a larger image from iStockphoto.com (image number 05009631). A 12-megapixel DSLR with a professional grade lens at point blank range and a generous amount of in-camera sharpening is a very cruel combination for showing every minor imperfection in the skin’s surface (check out the nose). The technique in this tutorial can be used at full throttle to render the skin suitable for use in a skin care advertisement, or toned down a little to return the skin to something approaching normal (rather than how the camera lens captured it).

Step 1
Start the process of smoothing the skin by duplicating your background layer using the keyboard shortcut Ctrl + J (PC) or Command + J (Mac) and then go to Filter > Blur > Surface Blur. This filter, unlike the Gaussian Blur filter has a ‘Threshold’ slider that, if used correctly, will leave edges crisp and sharp whilst blurring the surfaces inside the edges. This will ensure there are no nasty haloes around the edges of your subject as a result of the blurring process.

Skin Retouching Tips In Photoshop CS4

Step 2
It is important to get the balance right between the Radius and the Threshold slider settings for each and every image (there is no one ‘perfect recipe’ that suits every image). To get a feel for what these two sliders do, set them both to a value between 20 and 25. Now move the Radius slider lower until you detect the surface tone becoming ‘mottled’ or ‘blotchy’ and then move it higher again until the surface appears very smooth. Finding the minimum radius that renders the surface smooth is your goal here.

Skin Retouching Tips In Photoshop CS4

Step 3
Now drag the Threshold slider higher until you see haloes appear around the edges of your subject. Back the slider off to a point where all of the haloes disappear. If you continue to move the slider lower, after the haloes have disappeared, you will start to re-introduce the finer detail that was removed the by the Radius slider. Try to make the surface as smooth as possible at this stage as we will reintroduce the texture of the skin in a later step.

Skin Retouching Tips In Photoshop CS4

Step 4
Select OK to apply the Surface Blur filter and then hold down the Alt key (PC) or Option key (Mac) and click on the Add layer mask icon at the base of the Layers palette. This will add a layer mask filled with black that conceals the surface blur on Layer 1. Select white as the foreground color in the Tools palette and then choose a soft-edged brush and set the opacity to 60-80% in the Options bar. Paint to reveal the blur in the areas of the skin only. You do not need to be too critical about accuracy as areas of fine detail such as the eyelashes and the contours of the face have already been preserved on the Surface Blur layer. You will, however need to avoid painting over areas such as the lips to ensure fine detail is not lost in these areas. Paint a second time to reveal additional softening where needed.

Skin Retouching Tips In Photoshop CS4

Step 5
In this step we will eliminate minor imperfections in the skin that the surface blur filter could not smooth over. With the top layer selected hold down the Ctrl + Alt + Shift keys (PC) or Command + Option + Shift keys (Mac) and press the letter E to stamp the visible elements of the project to a new layer. Go to Filter > Noise > Dust & Scratches and set the Threshold slider to 0. Raise the Radius slider just enough to remove any large skin imperfections. Don’t worry about the lack of texture at this point in time.

Skin Retouching Tips In Photoshop CS4

Step 6
Raise the Threshold slider to reintroduce surface texture but stop just short of the point where the larger skin imperfections start to reappear. Select OK to apply the filter and then hold down the Alt/Option key and click on the ‘Add layer mask’ icon at the base of the Layers palette to conceal the effects of this layer.

Skin Retouching Tips In Photoshop CS4

Step 7
Select the Brush tool and white as the foreground color in the Tools palette and set the Opacity to 100% in the Options bar. Zoom in to 200% and paint to remove any imperfections. Hold down the Spacebar and click and drag to move the image in the image window so that you can navigate around the surface of the skin to look for additional imperfections. The skin should now be rendered smooth but with realistic surface texture and free from all minor imperfections.

Skin Retouching Tips In Photoshop CS4

The skin should now be rendered smooth but with realistic surface texture and free from all minor imperfections.

click here for source

Google’s Life Photo Archive

Diposting oleh De Journal di 06.41

Google together with Life magazine has published a photo archive of, according to Google, around 2 million photos (with around 8 million supposed to be released in the future). Many of these photos have never before been published, Google says. The actual search behind this is a regular Google image but with the parameter source:life in the query.

Colin in the forum writes “This is pretty cool to be able to browse through each decade of pictures” but notes you’re “limited to 200 results per search”. Colin adds:

Once you click on any photo result, it will load a landing page giving you more details about that photo and the chance to rate the photo with up to a 5 star rating. You can then click on the photo to view an even larger version. I hope over time they remove the 200 result limit. Otherwise you have to constantly tweak your search query to see any other photographs similar to your query. Besides photographs, they also scanned in TIME magazine covers.

As many photos are quite old, this also means many should have passed into the public domain zone, meaning you may be allowed to copy, edit, and republish that portion of the photos any way you like, including for commercial uses. Wikipedia says that “the copyright in a published work expires in all countries … when … The work was created and first published before January 1, 1923, or at least 95 years before January 1 of the current year, whichever is later”. However, Wikipedia also mentions some exceptions to these rules.

click here for source

Gmail Rolls Out Themes

Diposting oleh De Journal di 06.36

A couple of months ago it was mentioned here that Google’s web mail client Gmail might get themes, like a black-and-green terminal view, and the waiting time seems to be over soon – Google announced they’ve started to roll out this feature. While I don’t see it in my Gmail yet (the screenshots in this post are courtesy of Andris and Google), it’s supposed to be added to a Themes tab in your settings. Note some themes are dynamic and may change throughout different times of the day. “We’ve also done a minor facelift to Gmail’s default look,” Google adds.

click here for source

Create Temperature Converter with VB

Diposting oleh De Journal di 06.35

With winter around and daily temperature change has become a concern for many people especially those who travel a lot. They are constantly checking out temperature readings everyday However, different parts of the world often use different temperature scales, some of them use Fahrenheit and some use Celsius, so the readings can be confusing. Therefore, it is nice if we have a program that can convert Celsius to Fahrenheit and vice versa. And I have done just that using Visual Basic 6. The code is like this:

Private Sub Command1_Click()
Dim cel, Fah As Single
cel = Val(txtC.Text)
Fah = Val(txtF.Text)

If txtC.Text <> “” And txtF = “” Then
Fah = ((9 / 5) * cel + 32)
txtF.Text = Round(Fah, 1)
Else
cel = (5 / 9) * (Fah - 32)
txtC.Text = Round(cel, 1)
End If

End Sub

Private Sub Command2_Click()
txtC.Text = “”
txtF.Text = “”

End Sub

click here for source

6 Creative Reasons for Applying Blur to Photos

Diposting oleh De Journal di 06.31

Blurring, at it’s most fundamental level is the softening of an image. It is standard procedure to use a very slight blur on photos straight off your digital camera as often they are overly sharp. Sharpness, of course, isn’t a bad thing but it is more beneficially applied at the end of your retouching sessions than at the beginning.

There are many other (more creative) uses for blur though. Here are some examples.

To Imply Depth

Depth of field looks best when done in the camera, but when compositing photographs, you can imply distance and depth by blurring further away objects.
blur-applyingdepth.jpg

To Make Type More Readable

Setting type over a busy image can make the type hard to read. Blurring the image behind the type can make it more readable and make for a nice effect. Look at this example from PSDTuts.
blur-readabletype.jpg

To Imply Speed

Even if the object in a photo is in perfect focus, applying a direction (or “motion”) blur can imply speed.
blur-implyspeed.jpg

For An Appealing Background Image

Photoshop offers some interesting blur effects with their “Shape Blur” filter. Look how the martini splashes turn into squares here, which could make for a very nice background image.
blur-backgroundeffect.jpg

For A Surreal Feeling

Selective blurring like the “Surface Blur” filter in Photoshop can apply really nice effects to some photos. See below how this effect makes the football players seems surreal with some areas blurry and some sharply in focus.
blur-surreal.jpg

For An Illustrative or Cartoony Feel

Another selective blurring filter in Photoshop is the Smart Blur filter. This is good for removing fine detail in areas of similar color while keeping edges sharp. This can make for a very nice illustrative effect on photos or even cartoon-like in it’s extreme.
blur-cartoony1.jpg

Click here for source

Free Chart and Graph Solutions

Diposting oleh De Journal di 06.25

Charts and graphs help the user to visualise data in a more meaningfull way than rows of text statistics. They are extensively used in reporting applications, for displaying earnings, website traffic etc - here we take a look at some pre-made scripts and frameworks available to the web designer or web application developer …


Open Flash Chart - Open Flash Chart, is open source. It is free to use and you get the source code to fiddle with

114.jpg


amCharts - Pie and donut charts, line and area charts, column and bar charts, scatter and bubble charts and an interactive map tool are all free for download

29.jpg


Php / Swf Charts - PHP/SWF Charts is a simple, yet powerful PHP tool to create attractive web charts and graphs from dynamic data. Use PHP scripts to generate or gather the data from databases, then pass it to this tool to generate Flash (swf) charts and graphs. Any other scripting language (ASP, CFML, Perl, etc.) can be used with XML/SWF Charts (the XML version of the same tool.)

33.jpg


Fusion Charts Free - FusionCharts Free is a flash charting component that can be used to render data-driven & animated charts for your web applications and presentations

43.jpg


Yahoo! UI Library: Charts - The YUI Charts Control visualizes tabular data on a web page in several possible formats including vertical columns, horizontal bars, lines, and pies. Notable features include support for the DataSource Utility, customizable series and axes, a customizable mouse-over datatip, combination charts, and skinning

53.jpg


Flot - Flot is a pure Javascript plotting library for jQuery. It produces graphical plots of arbitrary datasets on-the-fly client-side. The focus is on simple usage (all settings are optional), attractive looks and interactive features like zooming

63.jpg


SAC - Simple accessible charts, An easy, fast and accessible way to display simple Data and beautify them with CSS. Works fine in FF, IE 7/6, Opera 9 tested on WIN XP

73.jpg


Similie - Timeplot is a DHTML-based AJAXy widget for plotting time series and overlay time-based events over them (with the same data formats that Timeline supports)

82.jpg


PlotKit - PlotKit is a Chart and Graph Plotting Library for Javascript. It has support for HTML Canvas and also SVG via Adobe SVG Viewer and native browser support

92.jpg


Libchart - Libchart is a free chart creation PHP library, that is easy to use

102.jpg

Click here for source

How to fast Indexing Search Engine to website / blog

Diposting oleh De Journal di 21.35

Senin, 19 Januari 2009

1. Create a link on that page is indexing search engines to the direction of our new website. We emulate the profile (for example: “www.friendster.com / okam” is a good example to link to the blog or our website. Because this page usually has terindeks search engine. The higher the position of the pages in search engines (PageRank) means the more quickly we terindeks new webiste.
You can contact your friend is terindeks the blog search engines to install a link to you.
* If the profile / emulate in your blog / Multiply terindeks already, you can install a link in your profile is.
* Every fill your blog. Google Analytic is a plug-in idea will always monitor your activities.
2. Submit manually through the following URL (FREE):
* Google: http://www.google.com/addurl.html
* Yahoo: http://search.yahoo.com/info/submit.html
* AltaVista: http://www.altavista.com/addurl/
* DMOZ / ODP: http://www.dmoz.org/add.html
* Alexa: http://www.alexa.com/support/get_archive.html
* MSN: http://search.msn.com/docs/submit.aspx
3. Submit the URL pay:
* Lycos: http://home.lycos.com/addasite.html
4. Before downloading you submit the URL of your website, make sure that:
* Website or blog so you have (not under construction).
* There are no dead links in your website.
* Website or made to your search engine friendly.

After you submit your URL, wait with patience. If the website you will be lucky terindeks in less than 24 hours, if not prosper you must wait 3 months, possibly even your application is not accepted Search Engine. You can re-submit if within 3 months of your website not appear in search engines.

What should be done during the wait? Building the link. Can be suddenly your website because nongol not submit manually, but because of a link from another website.

Congratulations to try.